

Fun plug only
Installation
Please pay attention to error messages when you get them! Good reading will solve most of your problems ;-) Good luck.
To get access to you NAS, you'll need the so called fun_plug, a piece of software used for installing optional elements. This wil make your NAS accesible trough telnet.
The fun_plug used, is created by Fonz. A nice German who put alot of effort in it. We don't mention the war.
You can download the fun_plug here. Version used in this manual is 0.5.
The extracted archive has two files in it: fun_plug.tar en fun_plug. Copy this file to the root directory of your network share on your NAS (Volume_1 or Volume_2) .
When you have one harddisk or multiple harddisks in RAID mode, one copy to the network share with your data is ok. When you have to seperate harddisks, copy the files to both Volumes.
The fun_plug will be installed on both disks. You can validate this by checking the newly created fun_plug.d folder.
When editing the fun_plug script (see later in this manual) you have to edit the file on Volume_1 only. You can delete the fun_plug script file from the other Volume after reboot. But only the script file!! Maybe this is better to avoid confusion.
You're free to choose to install applications on HD_a2 or HD_b2. In this manual only HD_a2 is discussed. Mldonkey's configuration files are typically set op for HD_a2.
Reboot your NAS after copying the fun_plug files.
After rebooting, start Putty (telnet/SSH client) and make a connection to your NAS IP address. If everything is working fine, you should see a command line.
It's important to give your NAS some time for rebooting. In some cases it can take a while to install the fun_plug. When you have the feeling nothing happened after fifteen minutes, try to check the following:
- Did you use Winzip of Windows native uncompression to extract the fun_plug? (don't: use winrar!)
- Firmware update to last version? (and did you reset all settings afterwarts?)
- Remove 'old' fun_plug files from Volume_x disks
- Please copy the fun_plug installatin file to both disks when you have more accesible volumes.
- Do non of above things work? Please delete all fun_plug installation files and diretories. Reset the machine to factory default and try again. When you have more disks, you can try to install fun_plug on the seperate volumes to see what it does.
You no have access to your NAS. It has to be said this connection isn't safe. You won't be askes for a username/password. To increase security, please use SSH. See the SSH chapter further on. When you choose not to implemented SSH, please do take into consideration your NAS's availability when it's on an open network.
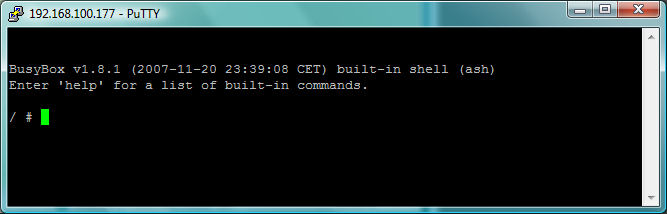
NAS telnet login screen
Fun Plug installation (additions)
Before installing further additions to your NAS's fun_plug, you'll need a certain amount of packages. Follow these steps to install them:
1. Login to your NAS using telnet
2. Install additional packages for your NAS (programs which can be executed by the fun_plug). Don't forget the "." in the commands!
# cd /mnt/HD_a2
# rsync -av inreto.de::dns323/fun-plug/0.5/packages .
3. Extract the packages
# cd packages
# funpkg -i *.tgz
The packages are ready for use. You can find a list of installed packages here.
4. Other additional packages you can find here. Don't forget the "." in the commands!
# rsync -av --delete wolf-u.li::ffp/additional .
In the newly created directory 'additional' you can find extra packages, which you can investigate later when you are interested. On this moment you won't need them.Here you can find more info.
When you see error 873, check your DNS IP adres in the settings of your NAS.
SSH
Telnet access is cool, but not secure. It's better and safer to work with SSH, particulary when your NAS is open to an open netwerk (e.g. Internet). SSH is secure shell environment. Other then telnet, all information is communication trough encryption.
With underneath lines you will creat a safe password and SSH access
1. Enable SSH and start daemon
# chmod a+x /ffp/start/sshd.sh
# sh /ffp/start/sshd.sh start
2. Create a password. The second command asks you to give a password
# pwconv
# passwd
3. Activate user 'root'
# usermod -s /ffp/bin/sh root
4. Test your new password by using user 'root'
# login
5. Please store password after test worked
# store-passwd.sh
6. Logout from your telnet session to return to your original telnet session
# exit
7. You can test SSH by login on to your NAS trough Putty (don't forget to choose SSH!). You will get a message about key exchanges. Accept this and afterwards login with user 'root' and your newly created password.
8. This step is optional. When SSH works, you can disable telnet. But you don't have to when your NAS is in a closed network environment
# chmod -x /ffp/start/telnetd.sh