

Applications
For the following applications, only the fun_plug is needed. Debian NOT needed.Twonky
The onboard CH3SNAS media server didn't work with my Playstation 3. For the DNS-323 NAS (D-link) is a Twonky media server build available. This will also work on the CH3SNAS, as both devices are technically the same. Twonky is no free software. You should register it within a month. In the current setup, it will work flawless with the PS3.
Download Twonky from it's website. Version 4.4.11 will do fine. Version 5 and higher will cause trouble. (crahes and samba crashes)
Within the ZIP file you will find an installer program (nassetup.exe), which you can use for installation on your NAS. Follow the instructions.
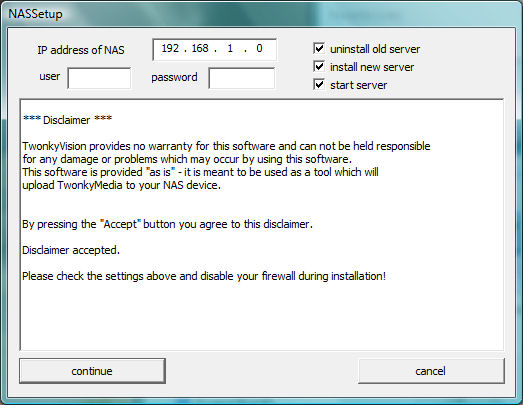
To start Twonky when starting your NAS, the fun_plug script has to be edited. Open the "fun_plug" in the root and add (when not already there!) :
>> /mnt/HD_a2/starttwonky.sh
After installation you can discover your CH3SNAS in your media players. In this case a PS3.

NAS visible on my PS3
NZBget
Nzbget is a application which can download articles (and files) from usenet. It's advantage against other clients is it's low CPU use and ability to download with encryption.
When you want to use par2 (repair downloads) and/or unrar (extracting downloads) CPU use will rise. This can have a negative impact when using your NAS as a media server. The device won't have enough capacity to handle all processes together and will slowdown. The use of par2 and rar is not discussed here.
1. Go to //mnt/HD_a2/
# mkdir nzbget
# cd nzbget
# mkdir nzb
# mkdir queue
# mkdir tmp
# chmod 777 nzb
# chmod 777 queue
# chmod 777 tmp
2. Create a temporary 'temp' folder on your disk (via windows explorer) NZBget will be extracted here. After this, use telnet/SSH to go to this folder.
# cd /mnt/HD_a2/temp
3. Download the newest testing version of NZBget from this location. In this case, I used version 0.6.0-r291. Save this file (nzbget-0.6.0-testing-r291-bin-dns323-arm-debug.tar.gz ) in your newly created temp folder.
4. Extract the file
# tar -xvzf nzbget-0.6.0-testing-r291-bin-dns323-arm-debug.tar.gz
5. NZBget is extracted now. Move the file 'nzbget' to the fun_plug 'bin' folder. Here we find all executable files
# cp nzbget /ffp/bin
6. We go to the configuration part now
# cd ffp/etc/
7. Download here a pre-fabricated file and store it in /ffp/etc/
It's good to go trough this configuration file. You can change more to your wishes in this file and will get you a little insight in Nzbget
# cd /ffp/etc/
# chmod 777 nzbget.conf
Easier to edit the file from windows.
8. Edit the file and edit the lines for your newsserver. You can find them under 'NEWS-SERVERS'
9. Make nzbget file executable
# chmod 755 /ffp/bin/nzbget
10. You can start Nzbget in 'daemon' mode. This will keep the program runnig, even after logging of trough telnet or SSH.
# nzbget -c /ffp/etc/nzbget.conf -D
11. You can test your configuration by putting a .nzb file in folder /usenet/nzb/. To see what Nzbget does, issue this command: (Nzbget will notice the .nzb file after thirty seconds or so)
# nzbget -c /ffp/etc/nzbget.conf -L
The installation of Nzbget can be further optimized by accessing it through a web interface and enabling unrar. You can find more information about that here. Par2 repair can be enabled in the configuration file under 'PAR CHECK/REPAIR'.
To start NZBget when starting your NAS, you have to edit the fun_plug script. Open the "fun_plug" file in the root en add:
>>nzbget -c /ffp/etc/nzbget.conf -D
Transmission
Transmission is a torrent client. An alternative is MLDonkey, a heavier client which can handle torrent files but also supports the edonkey (p2p) protocol. Transmission supports the Bittorrent encryptie protocol.
1. Download transmission and extract
# cd /mnt/HD_a2/
# mkdir temp
# cd temp
# wget http://kylek.is-a-geek.org:31337/files/curl-7.18.1.tgz
# wget http://kylek.is-a-geek.org:31337/files/Transmission-1.51.tgz
# funpkg -i curl-7.18.1.tgz
# funpkg -i Transmission-1.51.tgz
3. Create a folder in /mnt/HD_a2/. This is were the downloaded files are saved.
# cd /mnt/HD_a2/
# mkdir transmission
# chmod 777 transmission
4. Make newly installed transmission file executable.
# chmod a+x /ffp/start/transmission.sh
5. Edit the configuration file in \.transmission-daemon\settings.json . Please add your own IP range to the rpc-whitelist line.
>> "download-dir": "\/mnt\/HD_a2\/transmission\/",
>> "encryption": 2,
>> "rpc-whitelist": "127.0.0.1,192.168.1.*,
4. You can start Transmission by issueing the following command
# sh /ffp/start/transmission.sh start
Transmission is now running on your NAS. You can access the web interface on port 9091 (e.g.: http://192.168.x.x:9091)
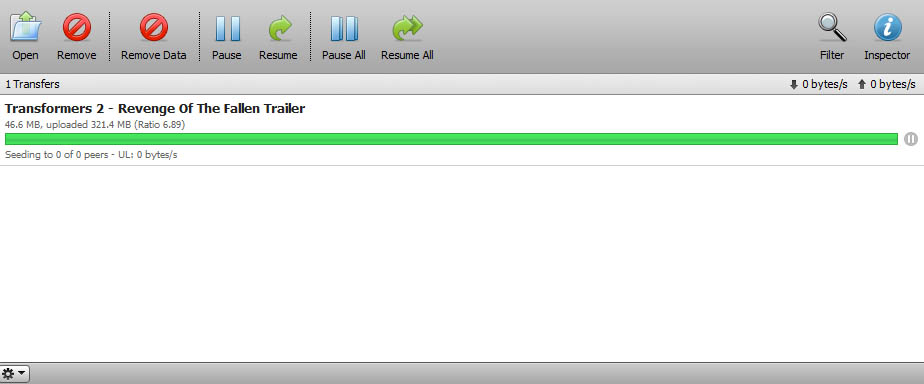
Screendump Transmission web interface
5. Stopping Transmission:
# sh /ffp/start/transmission.sh stop
To start Transmission when starting your NAS, you have to edit the fun_plug script. Open the "fun_plug" file in the root en add:
>> /mnt/HD_a2/ffp/start/transmission.sh start
Mldonkey
Mldonkey is a client for downloading from the Edonkey network and downloading torrents. It's client is accesible trough a web interface.
Installation instructions are found on the following website. I run version 3.0.0. After a succesfull installation you can reach MlDonkey trough the web interface on port 4080 (e.g. http://192.168.x.x:4080). Files which are needed are stored in mldonkey/incoming/ .

The MLdonkey 2.9.3. web interface on port 4080
To start MlDonkey when starting your NAS, you have to edit the fun_plug script. Open the "fun_plug" file in the root en add:
>> /mnt/HD_a2/mlnet.sh
FTP server
Trough the NAS web config you can configure a standard FTP. This is very simple and not discussed here.